> ## Documentation Index
> Fetch the complete documentation index at: https://doc.lwops.cn/llms.txt
> Use this file to discover all available pages before exploring further.
# 4.5. 惠普3par存储
### 4.5.1. 创建监控用户
设备上创建专用于监控的账号,其权限能够ssh进设备执行各种show命令。
### 4.5.2. 配置采集服务器免密访问3par设备
在采集服务器上,切换到zabbix 用户(服务进程用户),查看是否已经生成了密钥。 如果没有名称为id\_rsa.pub或者id\_dsa.pub密钥,则在zabbix用户(服务进程用户)下,执行ssh-keygen生成公私密钥对
```text theme={null}
ssh-keygen
```
然后一直按enter直到结束即可。 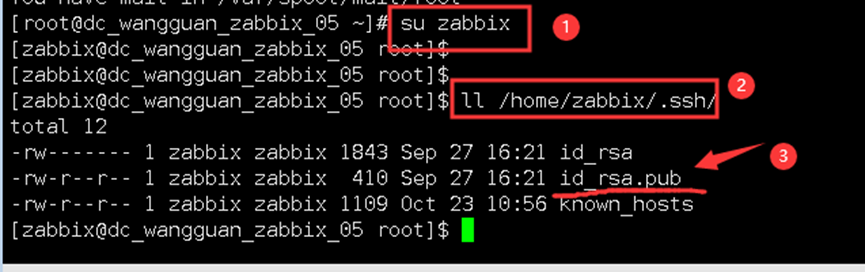 执行cat命令查看id\_rsa.pub/id\_dsa.pub密钥的内容,复制下来,然后在3par存储上执行setsshkey命令,将密钥内容粘贴进去,按enter键两下结束输入即可。
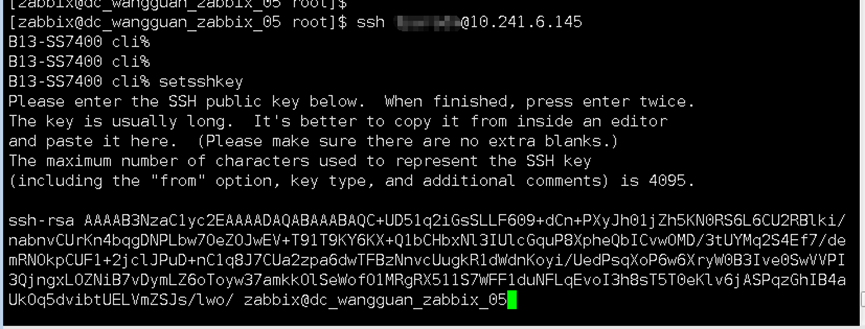 然后创建存放数据文件目录
```text theme={null}
cd /tmpmkdir 3par
```
正常监控如下图所示:
然后创建存放数据文件目录
```text theme={null}
cd /tmpmkdir 3par
```
正常监控如下图所示: 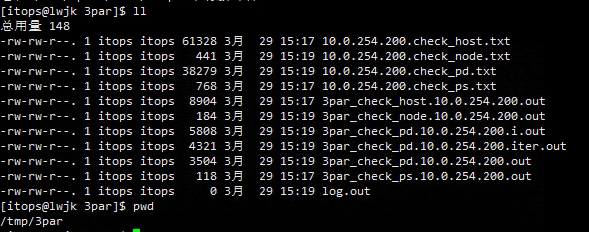 ### 4.5.3. 配置SNMPTrap
```text theme={null}
showsnmpmgr # 查看当前已配置的trap地址addsnmpmgr –p 162 –pw public(团体名) –version 2 10.130.21.33(trap接收服务器地址) # 添加SNMP trap接收地址
```
### 4.5.4. 测试snmptrap
在采集服务器上使用tcpdump命令监听trap信息。
```text theme={null}
tcpdump -nn "udp" and host 10.241.6.145#命令格式为:tcpdump -nn "udp" and host 设备IP
```
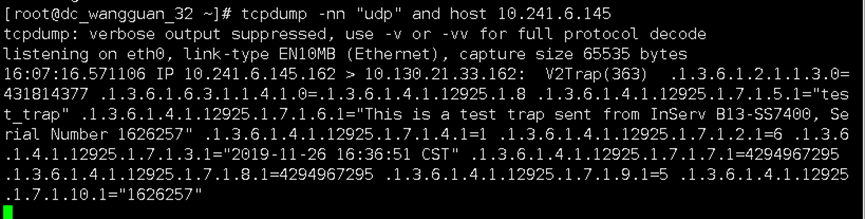
3par上执行SNMPTrap测命令
```text theme={null}
checksnmp
```
采集服务器得到的trap结果如下:
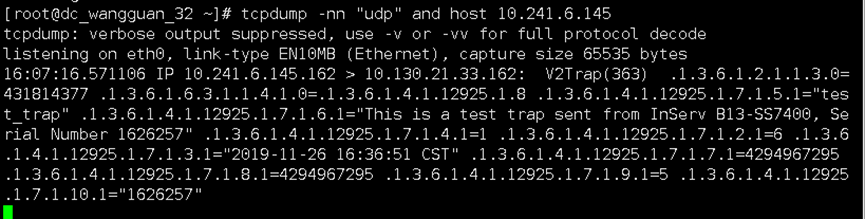
### 4.5.3. 配置SNMPTrap
```text theme={null}
showsnmpmgr # 查看当前已配置的trap地址addsnmpmgr –p 162 –pw public(团体名) –version 2 10.130.21.33(trap接收服务器地址) # 添加SNMP trap接收地址
```
### 4.5.4. 测试snmptrap
在采集服务器上使用tcpdump命令监听trap信息。
```text theme={null}
tcpdump -nn "udp" and host 10.241.6.145#命令格式为:tcpdump -nn "udp" and host 设备IP
```

3par上执行SNMPTrap测命令
```text theme={null}
checksnmp
```
采集服务器得到的trap结果如下:
