> ## Documentation Index
> Fetch the complete documentation index at: https://doc.lwops.cn/llms.txt
> Use this file to discover all available pages before exploring further.
# Postman调用乐维API指南
## **1. Postman 简介**
Postman 是一款常用的 API 调试工具,可以发送 HTTP 请求、查看响应结果,支持 GET、POST、PUT、DELETE 等多种请求方式。
## **2. 确认IP地址以及端口**
IP是部署了乐维产品的IP
乐维产品默认使用了2个端口
* 80/443端口 (对应前端接口)
* 8081 (对应后端接口,API请求也使用这个接口)
**特殊情况,若存在8081没有放通的,可使用/backend\_api 地址请求,这个地址通过80代理到了8081**
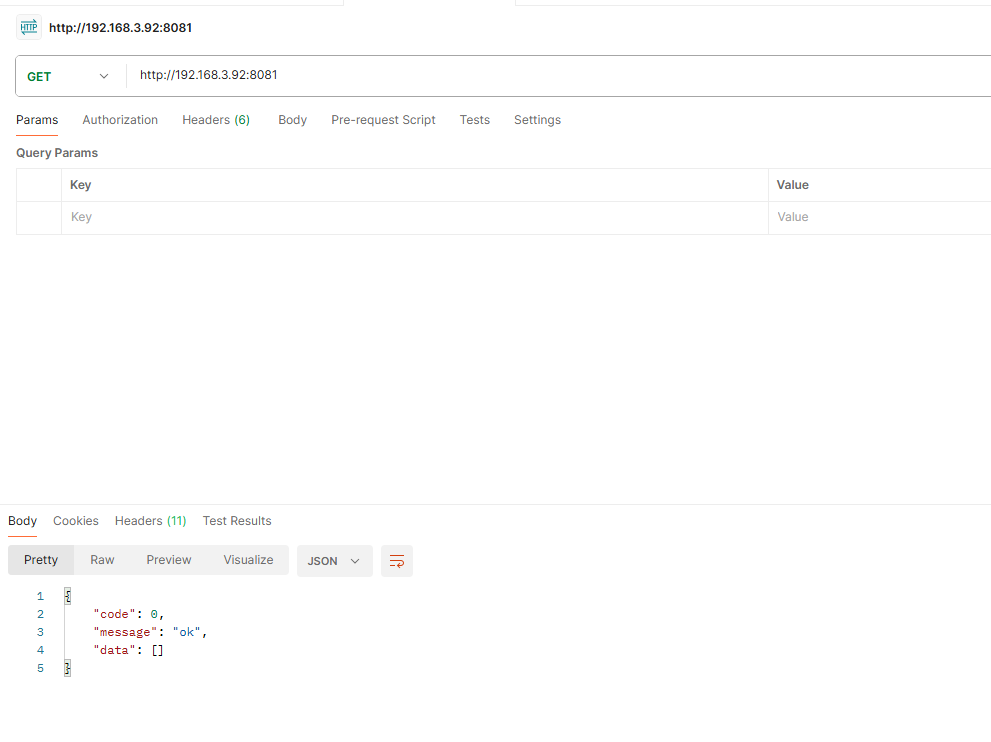
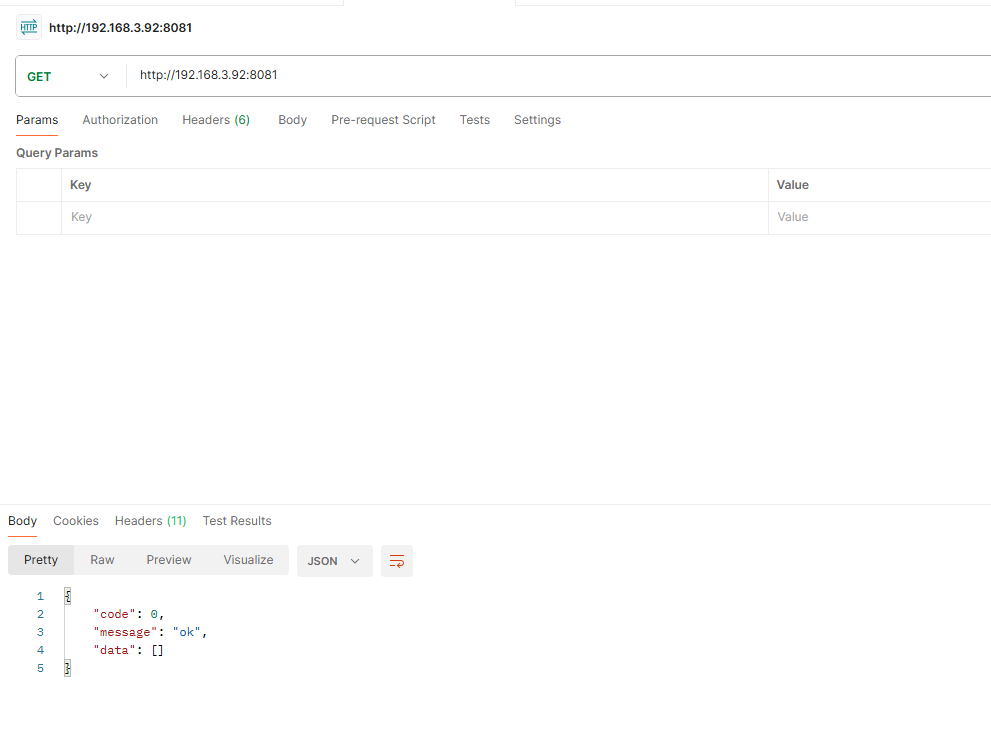
总结起来,有2个方式可以请求到API(下图假设部署地址为192.168.3.92)
▶ [**http://部署IP:8081**](http://部署IP:8081)
 ▶ **[http://部署IP/backend\_api](http://部署IP/backend_api)**
 ## **3. 确认签名secret**
密钥用于加密参数,支持以下2种方式
* 通用秘钥(无接口权限控制,由平台提供,在lwjk\_app目录下的.env内,有一个API\_SECRET\_KEY)(示例)
```json theme={null}
例如:
033bd94b1168d7e4f0d644c3c95e35bf
```
注: 目录通常为/itops/nginx/html/lwjk\_app/,具体以安装目录为准。
* 应用权限配置秘钥(由管理员在系统管理》API管理下创建),包含两部分,分别为Access Key与Secret Key
Access Key 作为请求头的一部分,Secret Key作为通用秘钥的API\_SECRET\_KEY
```json theme={null}
例如:
Access Key: 1d760a47d0986447f3876c3e00d2c19fd2af8ec7
Secret Key: 7265dba5c66424494d051132297eae82ad4c664f
```
## **4. 确认请求地址**
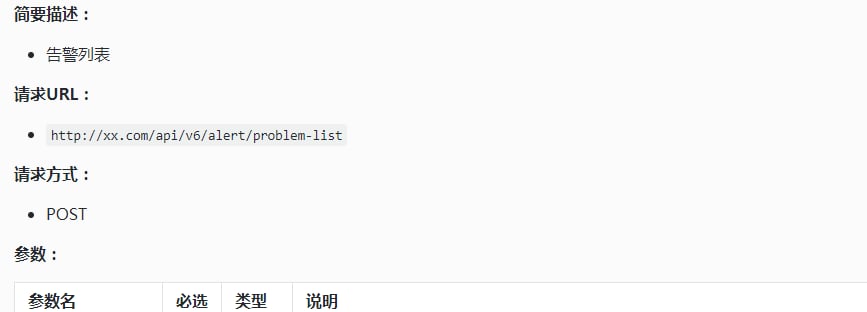
例如我们要求请求告警列表
## **3. 确认签名secret**
密钥用于加密参数,支持以下2种方式
* 通用秘钥(无接口权限控制,由平台提供,在lwjk\_app目录下的.env内,有一个API\_SECRET\_KEY)(示例)
```json theme={null}
例如:
033bd94b1168d7e4f0d644c3c95e35bf
```
注: 目录通常为/itops/nginx/html/lwjk\_app/,具体以安装目录为准。
* 应用权限配置秘钥(由管理员在系统管理》API管理下创建),包含两部分,分别为Access Key与Secret Key
Access Key 作为请求头的一部分,Secret Key作为通用秘钥的API\_SECRET\_KEY
```json theme={null}
例如:
Access Key: 1d760a47d0986447f3876c3e00d2c19fd2af8ec7
Secret Key: 7265dba5c66424494d051132297eae82ad4c664f
```
## **4. 确认请求地址**
例如我们要求请求告警列表
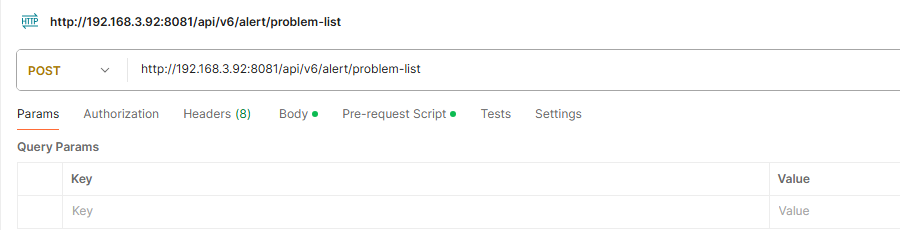
 结合前面的信息,请求地址如图
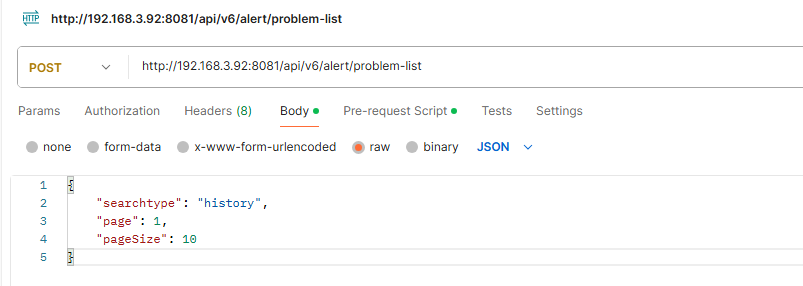
 ## **5. 确认请求参数**
请求使用Content-Type: application/json,因此Postman需要使用raw的JSON格式
假设我们要取历史告警的第一页,每页为20条,如图
## **5. 确认请求参数**
请求使用Content-Type: application/json,因此Postman需要使用raw的JSON格式
假设我们要取历史告警的第一页,每页为20条,如图
 ## **6. 请求参数签名**
直接复制以下代码到postman的Pre-request Script即可
**注意:** 要把代码里的const secret = '033bd94b1168d7e4f0d644c3c95e35bf' 值修改为实际生产环境的值,也就是第三步的值!
## **6. 请求参数签名**
直接复制以下代码到postman的Pre-request Script即可
**注意:** 要把代码里的const secret = '033bd94b1168d7e4f0d644c3c95e35bf' 值修改为实际生产环境的值,也就是第三步的值!
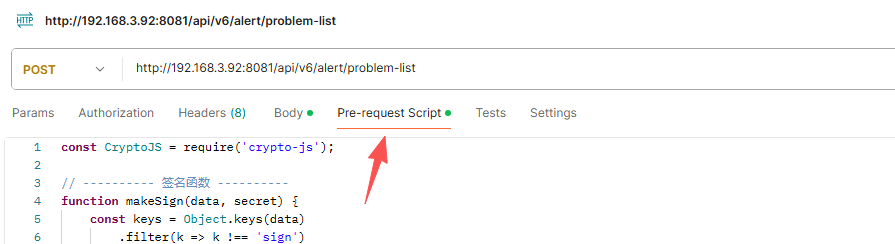 代码如下(以下代码会让Postman在每次请求前,自动在发送的JSON参数里追加timestamp、sign参数):
```json5 theme={null}
const CryptoJS = require('crypto-js');
// ---------- 签名函数 ----------
function makeSign(data, secret) {
const keys = Object.keys(data)
.filter(k => k !== 'sign')
.sort();
let str = '';
for (const k of keys) {
let v = data[k];
if (v === '' || v === null || v === undefined) continue;
if (Array.isArray(v)) continue;
if (typeof v === 'boolean') v = v ? 1 : 0;
str += k + v;
}
return CryptoJS.SHA1(secret + str).toString().toLowerCase();
}
// ---------- 读取当前请求参数 ----------
const data = {};
const body = pm.request.body;
if (body.mode === 'urlencoded') {
body.urlencoded.each(item => { data[item.key] = item.value; });
} else if (body.mode === 'formdata') {
body.formdata.each(item => { data[item.key] = item.value; });
} else if (body.mode === 'raw') {
try { Object.assign(data, JSON.parse(body.raw)); } catch (e) {}
}
// ---------- 2. 附加 timestamp(参与签名) ----------
const timestamp = Math.floor(Date.now() / 1000);
data.timestamp = timestamp;
console.log('timestamp =', timestamp);
// ---------- 计算 sign ----------
const secret = '033bd94b1168d7e4f0d644c3c95e35bf';
const sign = makeSign(data, secret);
console.log('sign =', sign);
// ---------- 把 sign 追加进请求体 ----------
if (body.mode === 'urlencoded' || body.mode === 'formdata') {
const target = body.mode === 'urlencoded' ? body.urlencoded : body.formdata;
// 先清理可能已存在的 timestamp / sign,避免重复
for (let i = target.member.length - 1; i >= 0; i--) {
const k = target.member[i].key;
if (k === 'timestamp' || k === 'sign') target.member.splice(i, 1);
}
target.add({ key: 'timestamp', value: String(timestamp) });
target.add({ key: 'sign', value: sign });
} else if (body.mode === 'raw') {
const obj = JSON.parse(body.raw);
obj.sign = sign;
obj.timestamp = timestamp;
body.raw = JSON.stringify(obj);
}
```
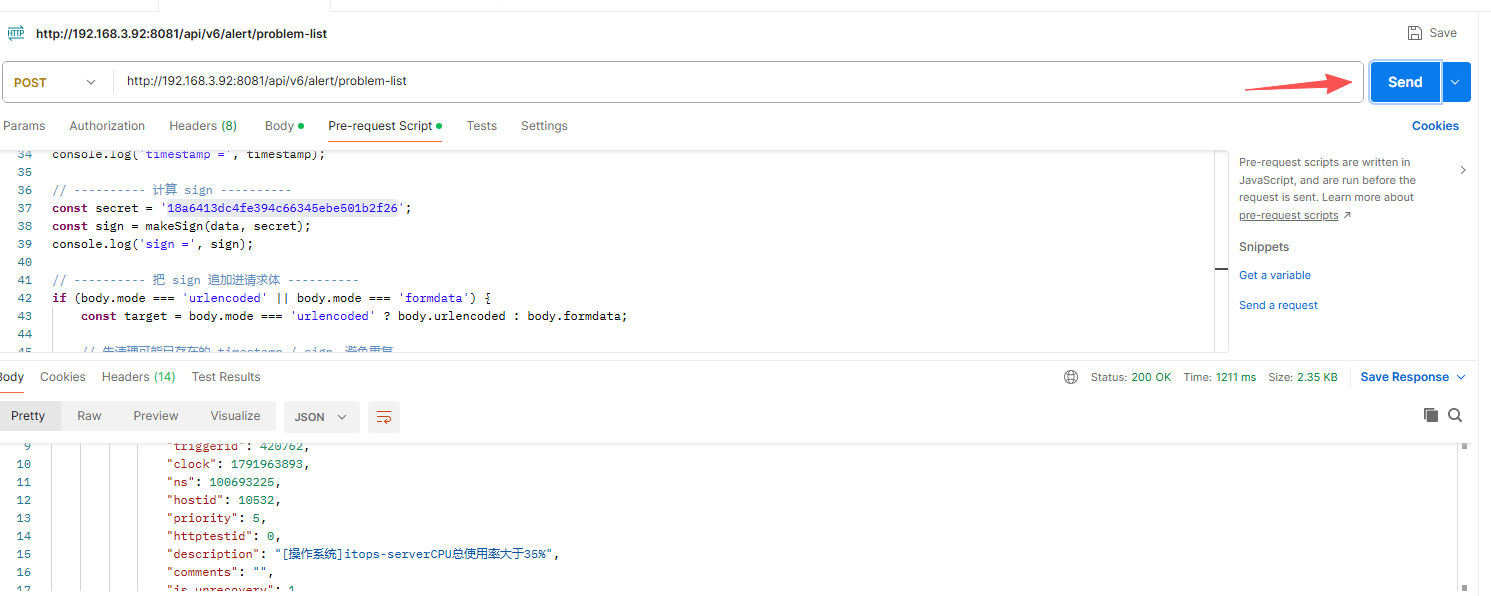
## **7. 点击Send按钮完成请求**
代码如下(以下代码会让Postman在每次请求前,自动在发送的JSON参数里追加timestamp、sign参数):
```json5 theme={null}
const CryptoJS = require('crypto-js');
// ---------- 签名函数 ----------
function makeSign(data, secret) {
const keys = Object.keys(data)
.filter(k => k !== 'sign')
.sort();
let str = '';
for (const k of keys) {
let v = data[k];
if (v === '' || v === null || v === undefined) continue;
if (Array.isArray(v)) continue;
if (typeof v === 'boolean') v = v ? 1 : 0;
str += k + v;
}
return CryptoJS.SHA1(secret + str).toString().toLowerCase();
}
// ---------- 读取当前请求参数 ----------
const data = {};
const body = pm.request.body;
if (body.mode === 'urlencoded') {
body.urlencoded.each(item => { data[item.key] = item.value; });
} else if (body.mode === 'formdata') {
body.formdata.each(item => { data[item.key] = item.value; });
} else if (body.mode === 'raw') {
try { Object.assign(data, JSON.parse(body.raw)); } catch (e) {}
}
// ---------- 2. 附加 timestamp(参与签名) ----------
const timestamp = Math.floor(Date.now() / 1000);
data.timestamp = timestamp;
console.log('timestamp =', timestamp);
// ---------- 计算 sign ----------
const secret = '033bd94b1168d7e4f0d644c3c95e35bf';
const sign = makeSign(data, secret);
console.log('sign =', sign);
// ---------- 把 sign 追加进请求体 ----------
if (body.mode === 'urlencoded' || body.mode === 'formdata') {
const target = body.mode === 'urlencoded' ? body.urlencoded : body.formdata;
// 先清理可能已存在的 timestamp / sign,避免重复
for (let i = target.member.length - 1; i >= 0; i--) {
const k = target.member[i].key;
if (k === 'timestamp' || k === 'sign') target.member.splice(i, 1);
}
target.add({ key: 'timestamp', value: String(timestamp) });
target.add({ key: 'sign', value: sign });
} else if (body.mode === 'raw') {
const obj = JSON.parse(body.raw);
obj.sign = sign;
obj.timestamp = timestamp;
body.raw = JSON.stringify(obj);
}
```
## **7. 点击Send按钮完成请求**
 This documentation is built and hosted on [Mintlify](https://mintlify.com), a developer documentation platform.